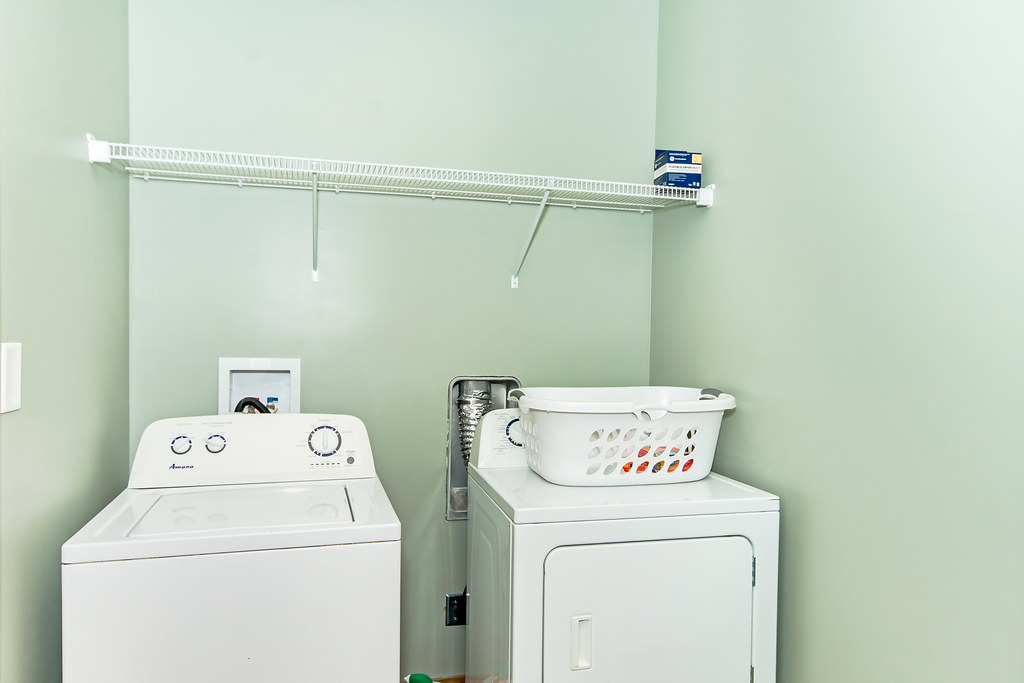
A laundry closet — a washer and dryer behind a pair of bifold doors, or a stacked unit in a hallway cupboard — usually has more usable space than it looks. The trick is to work out where you can’t put things first (vents, hoses, door swing, service access), and then fill what’s left in a deliberate order. This plan takes about an hour with a tape measure, before you buy anything.

Step 1: Measure the closet (and the clearances you must keep)
Write these numbers down. You’ll use them for every storage decision that follows.
- Interior width wall to wall, at floor level and at shoulder height. Closets are rarely square — use the smaller number.
- Depth from the back wall to the door frame. Then measure how far the front of the appliances sits from the back wall.
- Height from the top of the appliances (or the top of a stacked dryer) to the ceiling.
- Side gaps between each appliance and the wall, and between the washer and dryer.
- Door swing. Bifold and hinged doors eat into the front of the closet. Note how far they intrude when open.
Then note the spaces you must keep clear:
- Dryer venting. Vented dryers need the duct to run without being crushed or kinked. Don’t push shelves or carts against the vent run.
- Hoses and valves. You should be able to reach the water shut-off valves without unloading a shelf.
- Air and heat. Dryers need airflow. Follow the clearance figures in your appliance’s installation manual — many manufacturers specify a minimum gap at the sides, top and rear, and some require louvred doors for closet installs.
- Service access. Anything above the machines should be removable without tools so the appliances can be pulled out.
Step 2: Map three zones
Every small laundry space works better when items are grouped by how often you reach for them.
| Zone | Where | What goes there |
|---|---|---|
| Reach zone | Between hip and eye height, usually the first shelf above the machines | Detergent, stain remover, dryer sheets or balls — anything used every load |
| Overflow zone | Top shelf, up to the ceiling | Refills, bulk packs, rarely used cleaners |
| Gap zone | Side gaps and the space beside or between machines | Slim pull-out cart, ironing board, folded drying rack |
If a household member is shorter or uses a wheelchair, move the reach zone lower — a rolling cart in the gap can become the main reach zone.
Step 3: Use the space above the machines
The wall above a side-by-side washer and dryer is the largest unused area in most laundry closets.
- If you can drill: one or two shelves on brackets fixed into studs. Leave enough height above the machines to open a top-loading lid fully if you have one.
- If you rent and can’t drill: a freestanding over-washer shelf unit (the kind with legs that straddle the machines). Check three numbers against your measurements: the inside width between the legs, the inside height under the first shelf, and the overall depth. Choose one with anti-tip straps — and ask your landlord whether a small fixing is acceptable, because a tall unit without a fixing is a tipping risk.
- Tension-rod option: in a closet with solid side walls, a tension rod at the top can hold hangers for air-drying shirts. Check the rod’s load rating and the wall material.
Step 4: Make the gaps work
A gap of 5 inches (about 13 cm) or more beside the machines can usually take a slim slide-out cart. Measure the gap at the floor, the middle and the top, use the smallest figure, and leave about half an inch (1–1.5 cm) of clearance so the cart slides without scraping. Our guide to narrow rolling carts explains how to match cart width and depth to your gap.
Narrow gaps under 4 inches are better for flat items: an ironing board, a folded drying rack, or a hanging bag for lint and dryer sheets.
Step 5: Decide where the dirty laundry lives
In a closet laundry, the hamper usually can’t live inside. Options:
- A slim hamper beside the closet door or in the bedroom.
- A hamper on wheels that rolls to the machine on wash day.
- A two-compartment sorter in a nearby bathroom or hallway, if lights/darks sorting matters to you.
Avoid parking damp laundry in a closed closet — it traps moisture.
Step 6: Plan for drying
If you air-dry, plan the drying space before buying shelves, because it often competes for the same wall. A wall-mounted drying rack that folds flat can go on the inside of a closet door or a short wall nearby; a freestanding folding airer can store in the gap zone.
Step 7: Decant and label (only where it helps)
Decanting detergent into matching containers looks tidy but isn’t always practical. It helps when the original bottle is too tall for your shelf or has a dripping spout. It’s not worth it when you’d lose the dosing instructions or the safety information on the original label — keep that label or a photo of it. Store all detergents and pods out of reach of children.
A quick checklist
- Width, depth, height and side gaps written down
- Vent, hose and valve clearances marked
- Reach, overflow and gap zones assigned
- Above-machine storage that can be removed without tools
- Hamper and drying plan decided
- Renter limits checked (drilling, adhesives, anti-tip fixing)
Common mistakes
- Buying shelves before measuring door swing. Bifold doors can hit shelves that sit forward of the machines.
- Blocking the dryer vent. It reduces efficiency and is a fire risk.
- Overloading a freestanding unit. Keep heavy refills on the lowest shelf.
- Using every inch. Leave a little empty space — it’s what keeps the closet usable.
FAQ
How much space should I leave above a top-loading washer?
Enough to lift the lid fully and reach in — check the open-lid height in your washer’s manual and add a few inches for your hand.
Can I put shelves above a stacked washer and dryer?
Yes, if there’s room under the ceiling and the shelf doesn’t sit on the dryer. Wall-fixed shelves are best; never rest storage on top of a running dryer.
What’s the most useful single purchase for a laundry closet?
For most closets with a side gap, a slim rolling cart — it turns dead space into the reach zone. For closets without gaps, a shelf above the machines.